
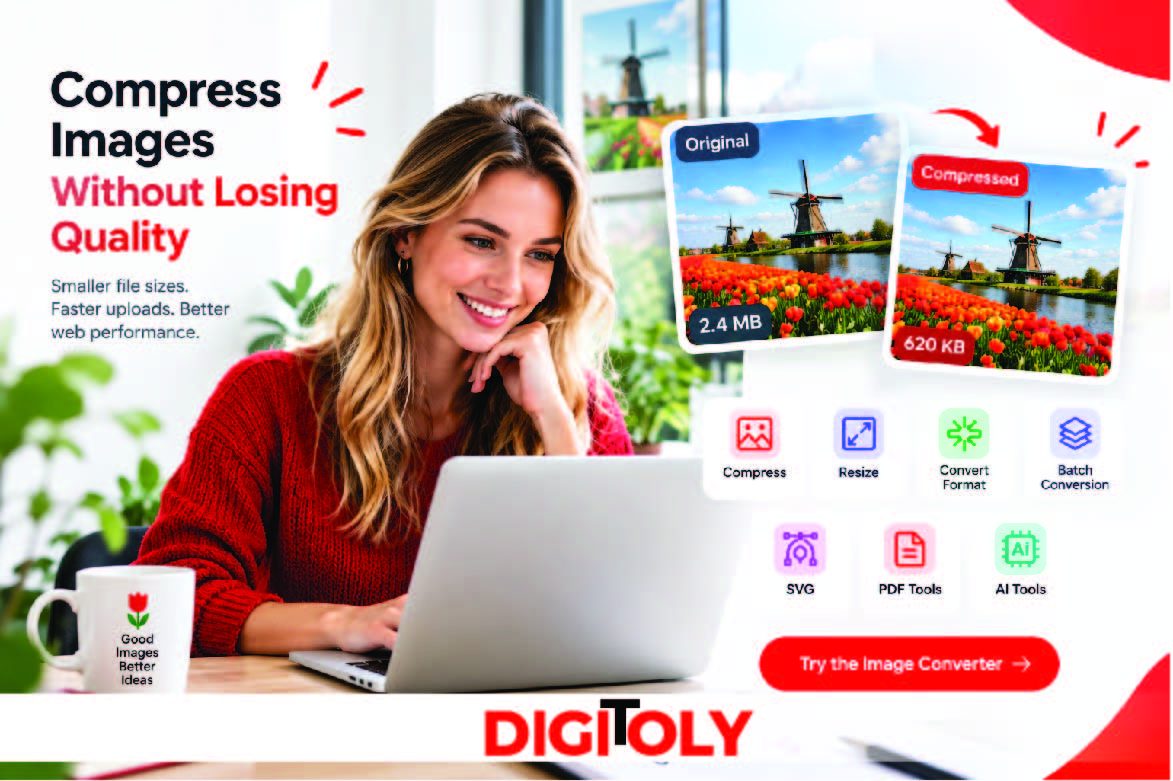
Have you ever tried uploading an image to a website, only to discover that the file is too large? Or perhaps your website loads slowly because its images take too long to download. Large image files can create problems when sharing photos, sending email attachments, uploading product pictures, or publishing content online.
The solution is often image compression.
Image compression reduces the file size of an image while aiming to preserve as much visual quality as possible. When done correctly, it can make images easier to upload, share, store, and display on websites without creating an obvious difference in appearance.
However, not all compression methods work the same way. Some preserve the original image data, while others remove information to achieve smaller files. Choosing the right format, compression settings, and image dimensions can make a significant difference to the final result.
In this guide, you will learn how to compress images online, how to reduce image file size without noticeable quality loss, which image formats work best, and how to avoid common compression mistakes.
If you want to get started immediately, visit the Digitoly Image Converter and explore the available image compression options.
What is Image Compression?
Image compression is the process of reducing the amount of data required to store an image.
A digital image contains information about its pixels, colors, dimensions, and, depending on the format, other details. Compression uses different techniques to represent that information more efficiently or to remove some information that has less impact on the image’s perceived appearance.
For example, an original photograph might occupy several megabytes of storage. After compression, it could occupy considerably less space while still looking very similar at its normal display size.
The actual reduction depends on factors such as:
- The original image format
- Image dimensions and pixel count
- The complexity of the image
- The compression method
- The selected quality settings
- Whether the image contains transparency
- Whether the image has already been compressed
Image compression does not always produce the same result. A detailed photograph, a simple icon, and a screenshot containing text may respond very differently to the same compression settings.
Lossless vs. Lossy Image Compression
Before compressing an image, it is useful to understand the two main types of compression.
Lossless Compression
Lossless compression reduces file size without discarding the original image data represented by the format.
When the image is decoded, the original pixel data can be reconstructed exactly.
Lossless compression is particularly useful for:
- Logos and icons
- Screenshots containing text
- Diagrams and charts
- Graphics with sharp edges
- Images that must preserve exact pixel values
PNG is a common image format that supports lossless compression. Some other formats also support lossless encoding.
The main limitation is that lossless compression may not reduce a file as much as lossy compression, particularly for complex photographs.
Lossy Compression
Lossy compression reduces file size by discarding some image information. The process can produce much smaller files, although the discarded information cannot be recovered perfectly from the compressed image.
Lossy compression is commonly used for photographs and other images where a small visual difference is acceptable.
It is useful for:
- Website photographs
- Blog images
- Travel pictures
- Product photography
- Images shared through email or messaging
- Other images where file size matters
JPG is a widely used lossy image format. WebP and AVIF can also provide lossy compression, depending on the encoding settings.
The key is to find a balance between file size and visual quality. More aggressive compression may produce a smaller file, but it can also create blur, blockiness, color artifacts, or other visible defects.
Lossless vs. Lossy: Quick Comparison
| Feature | Lossless compression | Lossy compression |
| Original pixel data | Can be preserved exactly | Some information is discarded |
| Potential file-size reduction | Often more limited | Often greater for photographs |
| Best suited for | Graphics, screenshots, exact data | Photographs and web images |
| Quality changes | No loss of decoded pixel data | Possible visible differences |
| Common examples | PNG lossless encoding | JPG, lossy WebP, lossy AVIF |
Which should you choose? Use lossless compression when exact pixel preservation is important. For photographs and many website images, carefully controlled lossy compression can offer a useful balance between appearance and file size.
How to Compress Images Online Without Losing Too Much Quality
You do not necessarily need professional editing software to reduce image file size. An online image compressor can simplify the process through a web browser.
Follow these steps to compress an image.
Step 1: Open an Online Image Compression Tool
Visit the Digitoly Image Converter and check the available image compression options.
An online tool can be convenient when you need to reduce a file before uploading it to a website, sharing it with someone, or attaching it to an email.
Before proceeding, check which formats the tool supports and whether it provides quality controls or separate compression options.
Step 2: Upload Your Image
Select the upload option and choose the image you want to compress.
Common image types include JPG, JPEG, PNG, and WebP, although supported formats depend on the tool.
If you are preparing images for a website, consider starting with the original image rather than a copy that has already undergone multiple compression steps.
Keep a backup of the original file. This allows you to try different settings without permanently losing access to the higher-quality source.
Step 3: Choose the Compression Settings
If the tool offers compression or quality settings, choose an appropriate starting point.
For photographs, a moderate lossy compression setting can often reduce file size while preserving an acceptable appearance. For screenshots, logos, and text-heavy graphics, a lossless option may be more suitable if available.
There is no universal setting that works best for every image. The correct choice depends on the image’s purpose and how much quality loss you can tolerate.
If the tool handles compression automatically, begin with its default settings and inspect the result before making further changes.
Step 4: Compress the Image
Start the compression process using the tool’s available controls.
The tool will process the image and produce a compressed version. Processing time and file-size reduction depend on the file, the compression method, and the tool’s implementation.
Avoid assuming that the smallest possible output is automatically the best result. A slightly larger file may look noticeably better, especially when the image contains fine details or text.
Step 5: Download the Compressed Image
Once compression is complete, download the resulting image using the available download option.
Save it with a clear filename so you can distinguish it from the original.
If you are preparing an image for a website or online form, check the downloaded file’s size and confirm that it meets the destination’s requirements.
Step 6: Compare the Original and Compressed Images
Open both versions and compare them at the size at which they will normally be viewed.
Look for:
- Blurry details
- Visible blocks or compression artifacts
- Changes in color or gradients
- Unwanted halos around edges
- Reduced clarity in small text
- Changes to transparency or the background
If the compressed image looks good and satisfies your file-size requirements, it is ready to use.
If the quality is not acceptable, try a less aggressive compression setting or use a different format. You can also consider resizing the image if its dimensions are larger than necessary.
Try it yourself: Use the Digitoly Image Converter to explore the available image tools.
How to Reduce Image File Size Without Noticeable Quality Loss
If your goal is to make images smaller while keeping them visually appealing, compression is only one part of the process. The following techniques can help you achieve better results.
Choose the Right Image Format
Different image formats are designed for different use cases.
- JPG/JPEG: Often a practical choice for photographs and realistic images.
- PNG: Useful for transparency, screenshots, logos, and graphics requiring lossless compression.
- WebP: Supports both lossy and lossless compression and can be useful for website images.
- AVIF: Supports efficient lossy and lossless image encoding, though compatibility requirements should be checked for your use case.
- SVG: Suitable for vector graphics such as many logos and icons; it is not a direct substitute for raster photographs.
Changing formats can reduce file size, but results vary. Converting a PNG photograph to JPG may produce a smaller file, while converting a JPG to PNG usually does not restore lost detail and may increase file size.
Choose a format that fits the image content and the destination’s requirements.
Resize Images to Their Actual Display Dimensions
One of the most effective ways to reduce file size is to avoid unnecessarily large image dimensions.
Suppose you have an image measuring 4000 × 3000 pixels, but it will be displayed at approximately 800 × 600 pixels on a webpage.
Depending on the display requirements, a smaller version may be sufficient. Reducing the dimensions can substantially reduce the amount of pixel data that needs to be stored.
Before resizing, consider:
- The maximum display dimensions
- Whether high-density displays need a larger source
- Whether the image will be cropped or zoomed
- Whether the same image is used at multiple sizes
Do not reduce dimensions blindly. An image that looks sharp on a small screen may become blurry if it needs to be enlarged later.
Use a Sensible Quality Setting
When using a lossy format, the quality setting can have a major effect on file size.
Higher quality settings generally preserve more visual information and produce larger files. Lower settings often produce smaller files but can make artifacts more visible.
A useful workflow is to start with a relatively high-quality result and gradually reduce the setting until the file meets your size requirements without unacceptable visual changes.
Compare the outputs at normal display size and, when needed, at 100% zoom.
Avoid Repeated Lossy Compression
Every time a lossy image is recompressed, additional visual information may be discarded.
For example, repeatedly opening and saving a JPG at different quality settings can gradually degrade details.
A better approach is to keep an original source file and generate compressed versions from it. If you need several output sizes or quality levels, create them from the same source instead of repeatedly recompressing an existing JPG.
Remove Unnecessary Metadata When Appropriate
Image files can contain metadata such as camera information, timestamps, color profiles, and other details.
Removing unnecessary metadata can sometimes reduce file size, although the benefit varies and may be small compared with image compression.
Metadata can also be useful. Color profiles, for example, can help ensure that colors are displayed consistently across applications.
If a tool provides metadata-removal options, understand what will be removed before enabling them. Consider privacy implications as well as the impact on color accuracy and workflow.
Use Modern Formats When Suitable
Modern image formats can sometimes achieve smaller files than older formats at similar perceived quality.
WebP and AVIF are examples worth considering for web publishing, but the best choice depends on your site’s requirements, supported browsers, delivery setup, and image content.
If your website uses a content management system or image delivery service, check whether it supports modern formats or automatic format negotiation.
Check Transparency Before Converting
If an image has a transparent background, ensure that your chosen output format supports transparency.
Converting a transparent PNG to JPG will require the transparent areas to be rendered against a solid background. This may change the image’s appearance.
If transparency matters, retain PNG or choose another appropriate format that supports it.
Which Image Format Produces the Smallest File Size?
There is no single image format that always produces the smallest file.
The result depends on image content, dimensions, encoding settings, transparency, and the quality level you need.
| Image type | Format worth considering | Why |
| Photographs | JPG, WebP, or AVIF | Lossy compression can reduce file size substantially |
| Logos with transparency | PNG or SVG, depending on the source | Transparency or vector scalability may matter |
| Screenshots with text | PNG or carefully tested WebP | Sharp edges and legibility are important |
| Simple illustrations | PNG, SVG, or WebP | The best choice depends on whether the graphic is vector or raster |
| Website thumbnails | JPG or WebP | A compact output is often useful |
| Images requiring exact pixel preservation | Lossless PNG or another suitable lossless format | Avoids lossy encoding changes |
Treat this table as a starting point rather than a guarantee. Test the formats using your actual images, and compare both file size and visual quality.
How to Compress JPG Images Online
JPG is already a compressed format, so further compression may reduce file size but can also reduce quality.
To compress a JPG effectively:
- Open an online image compression tool.
- Upload the original JPG.
- Choose the available compression or quality settings.
- Start the process.
- Download the compressed version.
- Compare the output with the original.
If the file remains too large, consider resizing it to the required dimensions.
Avoid repeatedly recompressing the same JPG. If possible, return to the original source and create a new compressed copy.
How to Compress PNG Images Online
PNG is particularly useful for images that need transparency or sharp graphic details.
To reduce a PNG file’s size:
- Upload the image to a tool that supports PNG compression.
- Use lossless compression if preserving exact pixel data is essential.
- If the image is larger than necessary, consider resizing it.
- Check whether the image contains unnecessary metadata.
- Download and inspect the compressed output.
If the image is a photograph and transparency is not required, testing JPG or WebP may produce a smaller file. However, the format change may introduce quality differences, so compare the results before choosing one.
Why Should You Compress Images for Your Website?
Image compression can benefit website owners, bloggers, designers, and online businesses.
- Improve Page Loading Performance: Large image files require more data to download. Reducing image sizes can help decrease the amount of data a page needs to transfer. The effect on actual loading speed depends on other factors, including network conditions, caching, server response, page structure, and how images are loaded. Compression is one part of an effective website performance strategy.
- Improve the Mobile Experience: Mobile users may have limited bandwidth or slower connections. Smaller image files can reduce data transfer and make pages more efficient to load. Pair compression with responsive image dimensions so that mobile devices do not need to download unnecessarily large images.
- Reduce Bandwidth Usage: If your website serves many image-heavy pages, reducing image file sizes can lower the total amount of data transferred to visitors.: The practical impact depends on your traffic volume, caching setup, and image delivery infrastructure.
- Support Search Engine Optimization: Search engines aim to provide useful results and a good user experience. Image optimization can support page performance, which is one component of the broader website experience. However, compressing images alone does not guarantee higher search rankings. Relevant content, accessibility, mobile usability, technical SEO, and many other factors also matter.
- Make Uploads and Sharing Easier: Smaller images can be easier to upload to content management systems, online forms, email services, and social platforms that impose file-size limits. Always check the destination’s current requirements, since compression may not be enough if the image dimensions or format are also restricted.
How Much Can You Reduce an Image’s File Size?
The amount of compression varies significantly from one image to another.
A photograph saved with inefficient settings may have substantial room for improvement. A PNG containing a simple graphic may already be compressed efficiently. A JPG that has been optimized several times may offer relatively little additional reduction without visible quality loss.
For a useful comparison, record:
- Original file size
- Compressed file size
- Original dimensions
- Output dimensions
- Output format
- Compression or quality settings, if available
- Whether the output looks acceptable
You can calculate the percentage reduction using this formula:
File-size reduction (%) = [(Original size − Compressed size) ÷ Original size] × 100
For example, if an image decreases from 2 MB to 1.2 MB:
[
\frac{2-1.2}{2}\times100=40%
]
The compressed file is 40% smaller than the original.
This is an illustrative calculation, not a promise of how much a particular image compressor will reduce your files.
The most important goal is not to achieve the largest possible reduction. It is to achieve a file size that meets your needs while maintaining acceptable image quality.
Common Image Compression Mistakes to Avoid
Mistake 1: Choosing the Lowest Quality Setting
The smallest file is not always the best file. Excessive compression can make photographs look unnatural and text-heavy graphics appear blurry.
Better approach: Compare several quality settings and choose the smallest file that still looks acceptable.
Mistake 2: Using JPG for Transparent Graphics
JPG does not support transparency. A transparent logo or icon may acquire a solid background when converted.
Better approach: Keep transparent graphics in PNG or another suitable transparency-supporting format.
Mistake 3: Compressing Images That Are Already Too Small
A small image may not become much smaller through additional compression, and visible quality loss may outweigh the benefit.
Better approach: Check the current dimensions and file size first. If the image already meets your requirements, additional compression may not be necessary.
Mistake 4: Ignoring Image Dimensions
A compressed image can still be unnecessarily large if it has far more pixels than its intended display area requires.
Better approach: Consider both compression and resizing.
Mistake 5: Replacing the Original File
If you overwrite your only copy with a lossy compressed version, you may not be able to recover the original quality.
Better approach: Keep the original file and save optimized copies separately.
Mistake 6: Assuming Compression Guarantees Faster Websites
Smaller image files can reduce data transfer, but website performance depends on more than image size.
Better approach: Combine image optimization with appropriate caching, responsive images, efficient loading behavior, and other performance improvements.
Is it Safe to Compress Images Online?
Online image compression can be convenient, but privacy depends on how a particular tool processes and stores your files.
Before uploading sensitive images, consider:
- Whether processing occurs in your browser or on a remote server
- Whether files are uploaded to an external service
- How long files are retained
- Whether temporary files are deleted automatically
- What the privacy policy says about uploaded content
- Whether the service is suitable for confidential or regulated information
Do not assume that every online tool processes images locally or deletes uploaded files immediately. Check the specific service’s documentation and privacy policy.
For confidential material, consider whether an offline tool or a verified local-processing workflow would be more appropriate.
Frequently Asked Questions
How can I compress an image without losing quality?
Use lossless compression when preserving the exact pixel data is essential. For photographs, use moderate lossy compression and compare the output with the original. You can also resize images to suitable dimensions and remove unnecessary metadata when appropriate.
What is the best way to compress images online?
Choose a reputable online image compressor that supports your image format. Upload the image, select suitable compression settings if available, download the result, and inspect its quality before using it.
Can I compress an image for free?
Some online tools offer free image compression, though usage limits and available options vary. Check the tool’s current pricing and limitations before using it. You can explore the available options at the Digitoly Image Converter.
Does image compression reduce quality?
Not always. Lossless compression preserves the original pixel data, while lossy compression discards some information to reduce file size. The visible impact of lossy compression depends on the image and settings.
Which image format is best for compression?
There is no universal winner. JPG is often suitable for photographs, PNG is useful for transparency and lossless graphics, and WebP or AVIF may offer efficient web delivery. The best choice depends on your image and requirements.
How do I reduce image file size for a website?
Start by choosing an appropriate format, resizing the image to suitable display dimensions, and applying reasonable compression. Also consider responsive images and efficient image delivery. Check the output on both desktop and mobile screens.
Can I compress JPG images without making them blurry?
You can often reduce JPG file size while maintaining acceptable visual quality, but some lossy recompression may introduce artifacts. Start with the original file, avoid repeated recompression, and compare the results before publishing.
Can PNG images be compressed?
Yes. PNG images can be compressed using lossless techniques. The reduction depends on the image and how efficiently it is already encoded. If the image is photographic and does not need transparency, you may also test a different format.
Should I resize an image before compressing it?
If the image dimensions are larger than necessary, resizing can reduce file size substantially. However, resizing is not always required. Keep the original dimensions when they are needed for the intended use.
Does image compression improve SEO?
Image compression can support website performance by reducing the amount of image data that must be transferred. It is only one part of SEO and does not guarantee better rankings. Content quality, accessibility, technical health, and the overall user experience remain important.
What is the difference between image compression and image resizing?
Compression changes how image data is stored to reduce file size. Resizing changes the image’s pixel dimensions. They can be used together, but they are different operations.
Can I compress images on my phone?
Yes. You can use a compatible online image compression tool in your mobile browser. The exact upload and download steps depend on your device, browser, and the tool’s interface.
Why is my compressed image still large?
The image may have large dimensions, complex details, or a format that is already efficiently compressed. Try appropriate resizing, test another suitable format, or adjust compression settings if available.
Is it possible to restore the original quality after lossy compression?
Not completely. Lossy compression discards information that cannot be reconstructed exactly from the compressed file. Keep the original image so you can generate new versions if needed.
Conclusion
Compressing images without losing too much quality is about finding the right balance between file size and visual appearance.
Start by choosing a suitable image format. Use lossless compression for graphics that need exact pixel preservation, and carefully controlled lossy compression for photographs when smaller files are a priority. Resize images when their dimensions exceed your actual requirements, avoid repeated lossy compression, and always inspect the final result before publishing or sharing it.
For website owners, bloggers, designers, students, and online businesses, these simple practices can make image files easier to manage while helping maintain a good visual experience.
Ready to optimize your images?
Visit the Digitoly Image Converter to explore its image tools and prepare your images for websites, uploads, and everyday sharing.

