
How to Optimize Product Images for an Online Store
Product images play a major role in online shopping. Customers cannot touch, feel, or examine products in person. Therefore, they depend on images to make buying decisions.
Clear product images help customers understand what they are buying. They also make your online store look more professional. However, large image files can slow down your website.
Slow websites can frustrate visitors and affect their shopping experience. Poorly optimized images can also waste valuable storage space.
That is why product image optimization matters.
It helps you balance image quality, file size, website speed, and search visibility. In this guide, you will learn how to optimize product images for an online store.
Let’s explore the best practices step by step.
What is Product Image Optimization?
Product image optimization means improving product images for websites and online stores. It involves adjusting image dimensions, formats, file sizes, and other details.
The goal is simple. Your images should look sharp without slowing down your website.
Effective image optimization usually includes:
- Choosing the right image format.
- Compressing images without noticeable quality loss.
- Resizing images to suitable dimensions.
- Using descriptive image file names.
- Adding helpful alt text.
- Maintaining consistent image dimensions.
- Delivering suitable images across different devices.
- Organizing product images properly.
These steps improve the shopping experience. They also help search engines understand your product images.
Why is Product Image Optimization Important for Ecommerce?
Product images influence how customers explore your online store. They also affect website performance and accessibility.
Here are the main reasons to optimize them.
- It Improves Website Loading Speed: Large images can increase the amount of data your website needs to load. This can make product pages slower. Visitors may leave when pages take too long to display. Therefore, smaller image files can improve the browsing experience. Optimized images help your store deliver product information more efficiently. They also support better page performance.
- It Creates a Better Shopping Experience: Customers want to inspect products before placing orders. They need clear images to understand product details. Blurry or poorly cropped photos can create confusion. Consistent, sharp images make browsing easier. Show different angles, close-ups, and useful product details. This helps customers make informed decisions.
- It Supports Image SEO: Search engines use several signals to understand images. These include file names, alt text, surrounding content, and page information. Descriptive image details help search engines understand your products. They also improve accessibility for people using screen readers. Optimized product images can support visibility in image search results. However, image optimization alone cannot guarantee higher rankings.
- It Helps Mobile Shoppers: Many customers browse online stores using smartphones. Large images can consume more mobile data. They may also take longer to load on slower connections. Properly sized images help create a smoother mobile experience.
- It Helps Manage Storage and Bandwidth: Online stores often contain hundreds or thousands of images. Large files can consume significant storage space. They can also increase the amount of data transferred to visitors. Image compression helps manage these resources more efficiently.
12 Best Ways to Optimize Product Images for an Online Store
Now, let’s explore practical ways to optimize your ecommerce images.
Choose the Right Image Format
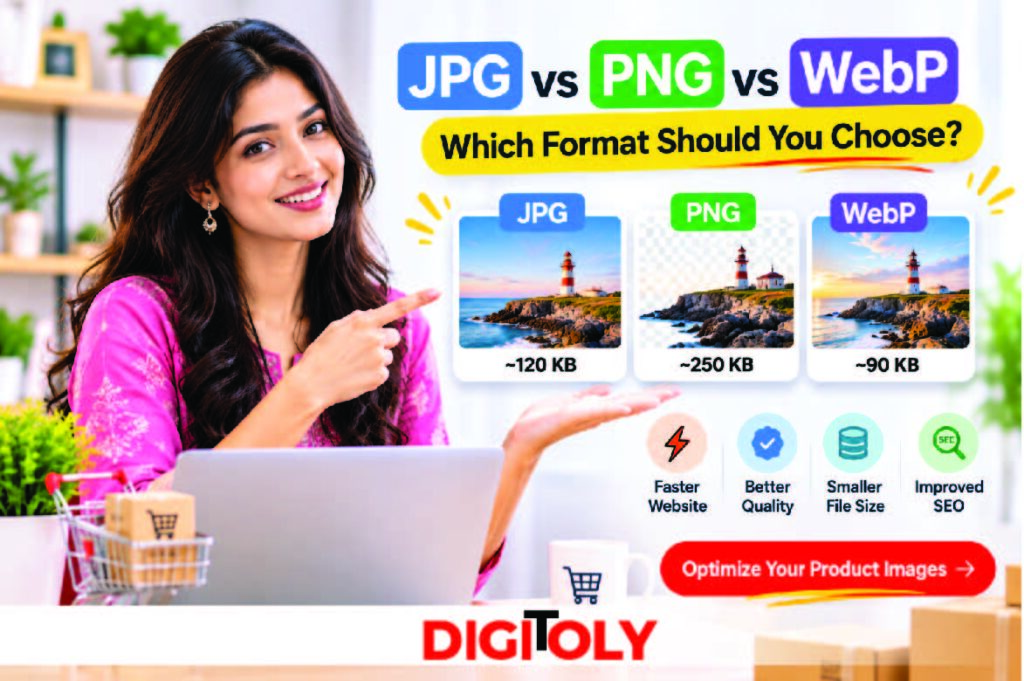
Your image format affects file size, quality, and transparency. Therefore, choose a format that suits each product image. Here are the most common options.
JPEG or JPG
JPEG works well for product photographs. It supports many colors and offers lossy compression. This makes it useful for detailed product images. However, repeated editing and saving can reduce image quality.
PNG
PNG uses lossless compression. It also supports transparent backgrounds. Use PNG for logos, icons, and product cutouts. It can produce larger files than JPEG for photographs.
WebP
WebP supports both lossy and lossless compression. It can offer smaller files while maintaining good visual quality. It also supports transparency. WebP is a useful option for many modern ecommerce websites.
AVIF
AVIF is another modern image format. It can provide efficient compression and good image quality. However, check your platform and browser support. Also, provide suitable fallbacks when necessary.
| Format | Best Use | Main Advantage |
| JPG | Product photographs | Good balance of quality and size |
| PNG | Logos and transparent images | Lossless quality and transparency |
| WebP | General ecommerce images | Efficient compression |
| AVIF | Modern web images | High compression efficiency |
Which format should you choose?
Use JPEG for traditional product photographs. Choose PNG when transparency or lossless quality matters. Consider WebP or AVIF for efficient web delivery. Always test how your ecommerce platform handles these formats.
Compress Product Images Without Losing Too Much Quality
Image compression reduces file size. It removes unnecessary data or stores image information more efficiently. Smaller images generally require less data to load. However, excessive compression can make product photos look blurry. You should balance file size and visual quality. There are two common compression methods.
- Lossy Compression: Lossy compression removes some image information. It can reduce file size significantly. However, excessive compression may create visible artifacts. Use it carefully for product photographs.
- Lossless Compression: Lossless compression reduces file size without removing original image information. It helps preserve image quality. However, lossless files may remain larger than lossy versions.
How to compress product images:
- Select the original product image.
- Upload it to an image compression tool.
- Choose a suitable compression setting.
- Preview the compressed image.
- Compare its quality with the original.
- Download and save the optimized version.
- Upload it to your online store.
You can use Digitoly Image Converter to explore available image compression options.
Always inspect product details after compression. Fine textures, labels, and small features should remain clear.
Resize Images to the Correct Dimensions
Uploading oversized images can waste bandwidth. Your website may display only a small version of them. For example, a product thumbnail does not need the same dimensions as a zoomable product image. Resize images according to their intended display area.
Consider these common image placements:
- Product thumbnails.
- Product detail pages.
- Product galleries.
- Category pages.
- Homepage product banners.
- Promotional sections.
The correct dimensions depend on your platform and theme. For example, Shopify recommends 2048 × 2048 pixels for square product images. This is a platform-specific recommendation, not a universal requirement. Check your store’s theme before choosing image dimensions.
Maintain Consistent Image Dimensions
Consistency makes your product catalog look organized. It also creates a more professional shopping experience. Imagine a category page with differently sized product photos. Some images look tall, while others appear wide. This can make the layout look uneven.
Use a consistent aspect ratio for similar product images. For example, square images often work well for product grids. However, do not crop important product details just to match dimensions. Keep the complete product visible whenever possible. Use suitable background space to maintain consistency.
Use High-Quality Product Photography
Image optimization starts with the original photograph. Compression cannot fix a poorly captured image. Use clear, well-lit product photos. Show important details from useful angles.
Follow these photography tips:
- Use natural or balanced lighting.
- Keep the product in sharp focus.
- Choose a clean background.
- Avoid unnecessary objects.
- Show important product details.
- Capture multiple viewing angles.
- Use accurate product colors.
- Avoid excessive filters and editing.
For clothing, show fabric texture and stitching, for electronics, highlight ports, buttons, and design details. For furniture, show the product from different angles. Include close-ups of important materials and finishes. Remember, your images should represent the actual product accurately.
Add Multiple Product Images
One photograph may not show everything customers need. Multiple images help shoppers understand a product better. Consider including these image types:
- Main Product Image: Show the product clearly from its best angle.
- Side View: Display its shape, depth, or design.
- Close-Up: Highlight materials, textures, and small details.
- Lifestyle Image: Show the product in a real-world setting.
- Size Reference: Help customers understand its dimensions.
- Packaging Image: Show what customers receive with their purchase.
Choose images based on your product category. Every additional image should provide useful information. Also, optimize every image you upload. Large galleries can increase page weight.
Write Descriptive Image File Names
Image file names provide useful context. Search engines can use them as one clue when understanding images.
Avoid generic names such as:
- IMG_1234.jpg
- DSC0001.png
- image-final.webp
- product-new-01.jpg
Instead, use short and descriptive names.
For example:
- black-leather-wallet.jpg
- mens-blue-running-shoes.webp
- ceramic-coffee-mug.png
- wooden-office-desk.webp
Follow these simple rules:
- Describe the actual product.
- Use lowercase letters.
- Separate words with hyphens.
- Avoid unnecessary numbers.
- Keep names short and meaningful.
- Do not repeat keywords unnecessarily.
Descriptive file names make image libraries easier to manage. They also provide useful context for search engines.
Add Relevant Alt Text to Every Important Image
Alt text describes an image for people who cannot see it. Screen readers use it to explain image content.
Search engines also use alt text to understand images. Therefore, write clear and meaningful descriptions.
For example:
- Poor alt text: shoe1.jpg
- Better alt text: Black running shoes
- More descriptive alt text: Black men’s running shoes with white soles
Your alt text should describe what the image actually shows.
Follow these best practices:
- Keep descriptions natural.
- Include relevant product details.
- Use keywords only when appropriate.
- Avoid keyword stuffing.
- Do not repeat the same description everywhere.
- Leave decorative images with empty alt text when appropriate.
For product images, mention useful details. These may include color, material, style, or product type.
For example:
alt=”Brown leather crossbody bag with adjustable strap”
Do not add details that the image does not show. Accurate descriptions help both shoppers and search engines.
Create Responsive Product Images
Customers use different devices to browse online stores. Your images should work well across screen sizes.
A large desktop image may be unnecessary on a smartphone. Delivering suitable image sizes can reduce unnecessary data transfer.
Use responsive image techniques where your platform supports them.
For example, HTML’s srcset attribute allows browsers to select suitable image versions.
<img
src=”product-800.webp”
srcset=”
product-400.webp 400w,
product-800.webp 800w,
product-1200.webp 1200w
“
sizes=”(max-width: 600px) 100vw, 50vw”
alt=”Brown leather crossbody bag”
width=”800″
height=”800″
>
This example provides multiple image sizes. The browser can select an appropriate version.
Your ecommerce platform may generate responsive images automatically. Check its image delivery settings before adding custom code.
Use Lazy Loading Carefully
Lazy loading delays image loading until images approach the visible screen area. It can reduce unnecessary initial loading. This is useful for product galleries and long category pages. Visitors do not need every image immediately. However, avoid lazy-loading the main product image when it appears above the fold. That image may be important for Largest Contentful Paint (LCP). Let the browser prioritize important visible content. Use lazy loading for suitable below-the-fold images. Test the page after making changes.
Use a Content Delivery Network (CDN)
A Content Delivery Network stores copies of website files across multiple locations. It helps deliver content from servers closer to visitors. This can improve image delivery for international customers. It is especially useful when your store serves different countries. Many ecommerce platforms already include image delivery through a CDN. Others support third-party CDN services.
Check whether your platform provides:
- Automatic image resizing.
- Modern image formats.
- Image compression.
- Browser-based format selection.
- Global image delivery.
A CDN does not replace image optimization. You should still upload suitable source images.
Test Your Product Images Regularly
Image optimization is not a one-time task. New products and design changes can affect performance. Review your product pages regularly. Check image quality, dimensions, loading behavior, and mobile display.
Useful tools include:
- Google PageSpeed Insights for page performance.
- Google Search Console for search visibility and indexing information.
- Browser developer tools for image loading and display checks.
- Digitoly Image Converter for available image conversion and compression tasks.
Test important product pages on desktop and mobile. Fix problems that affect image quality or usability.
Recommended Product Image Sizes for an Online Store
There is no single image size for every ecommerce platform. Your theme, layout, and zoom requirements determine the best dimensions.
The following values are practical starting points.
| Image Placement | Suggested Dimensions |
| Square product image | 1200 × 1200 px |
| High-resolution square image | 2048 × 2048 px |
| Product thumbnail | 300 × 300 px |
| Wide product banner | 1600 × 600 px |
| Portrait product image | 1200 × 1600 px |
| Category banner | 1600 × 500 px |
These are suggested dimensions, not strict platform requirements.
Always check your ecommerce theme’s specifications. Also, maintain consistent dimensions within similar product groups.
How to Optimize Product Images Using Digitoly
You can improve product images before uploading them. Digitoly Image Converter provides image-related tools in one place.
Here is a simple workflow.
Step 1: Select Your Product Images
Choose the original photographs from your device. Keep a backup of the original files.
Step 2: Check the Image Dimensions
Review each image’s width and height. Decide whether resizing is necessary.
Step 3: Choose a Suitable Format
Select a format based on the image and your store’s requirements. WebP can be a useful choice for many product photographs.
Step 4: Compress the Images
Use an available compression option to reduce file size. Preview the result before saving it.
Step 5: Review the Final Images
Check sharpness, colors, product details, and background quality. Make sure compression has not damaged important details.
Step 6: Upload the Optimized Images
Add the final images to your product pages. Include descriptive file names and useful alt text.
Explore the available tools at Digitoly Image Converter.
Common Product Image Optimization Mistakes to Avoid
Even experienced store owners can make image optimization mistakes. Avoid these common problems.
- Uploading Original Camera Images Directly: Camera images can have large dimensions and file sizes. Resize and compress them before uploading when necessary.
- Using the Wrong Image Format: PNG may create unnecessarily large files for photographs. JPEG or WebP may work better for those images. However, use PNG when transparency or lossless quality matters.
- Compressing Images Too Much: Excessive compression can create blurry images. It may also damage fine product details. Always compare the compressed image with the original.
- Ignoring Mobile Users: An image that looks good on desktop may not display properly on mobile. Test product pages across different screen sizes.
- Using the Same Alt Text Everywhere: Repeated alt text does not describe each product accurately. Write unique descriptions based on the visible image.
- Forgetting to Optimize Additional Images: Product galleries often contain several photographs. Optimize every useful image, not just the main product photo.
- Cropping Important Product Details: Poor cropping can hide important features. Keep the entire product visible whenever possible.
- Lazy-Loading the Main Product Image: The main image often appears immediately when a product page opens. Avoid delaying its loading unnecessarily.
Product Image Optimization Checklist
Use this checklist before publishing new product images.
- Choose the correct image format.
- Resize images to suitable dimensions.
- Compress images without visible damage.
- Maintain consistent aspect ratios.
- Use sharp and accurate product photographs.
- Add multiple useful product views.
- Write descriptive file names.
- Add relevant alt text.
- Check mobile image display.
- Use responsive image delivery.
- Lazy-load suitable below-the-fold images.
- Test product page performance.
- Review images after uploading.
Following this checklist helps maintain a consistent image optimization process.
Frequently Asked Questions
- How do I optimize product images for an online store?
Start by choosing suitable image formats and dimensions. Then compress images without damaging important details.
Use descriptive file names and relevant alt text. Also, test images on mobile devices and desktop screens.
- Which image format is best for ecommerce product images?
WebP is a strong option for many modern ecommerce websites. It offers efficient compression and supports transparency.
JPEG also works well for product photographs. Use PNG when you need transparent backgrounds or lossless graphics.
- What is the ideal size for ecommerce product images?
The ideal size depends on your ecommerce platform and theme. A square image around 1200 × 1200 pixels is a practical starting point.
Shopify recommends 2048 × 2048 pixels for square product images. Always check your platform’s requirements.
- How can I reduce product image file sizes?
Use an image compression tool to reduce file sizes. You can also resize oversized images and choose efficient formats.
Always preview compressed images before uploading them.
- Does image optimization improve ecommerce SEO?
Image optimization supports SEO in several ways. Descriptive file names and alt text help search engines understand images.
Optimized images can also support faster page loading. However, SEO depends on many other factors.
- Should I use PNG or JPG for product images?
Use JPG for most traditional product photographs. It provides a practical balance between quality and file size.
Choose PNG for transparent backgrounds and graphics. Consider WebP when your store supports it.
- How many product images should an online store display?
There is no fixed number for every product. Include enough images to explain its appearance and important details.
Show different angles, close-ups, and lifestyle views when useful. Avoid adding images that provide little extra information.
- Does image compression reduce product image quality?
Lossy compression can reduce image quality. However, careful settings can make those changes difficult to notice.
Lossless compression preserves image information. Compare the results before choosing a final version.
- Should product images have alt text?
Yes, meaningful product images should have descriptive alt text. It helps screen reader users understand the image.
It also gives search engines additional context. Keep descriptions accurate and natural.
- Can I use WebP images on my online store?
Many modern ecommerce platforms support WebP. However, support and upload rules differ between platforms.
Check your platform’s documentation before converting your entire product catalog. Use suitable fallbacks when necessary.
Final Thoughts
Product images do more than make an online store attractive. They help customers understand products and make confident buying decisions. However, large images can affect website performance. Poor image descriptions can also limit accessibility and search understanding.
Therefore, optimize every product image before publishing it. Choose suitable formats, resize images, and compress them carefully. Also, use descriptive file names and meaningful alt text. Make sure your images display correctly across different devices. Most importantly, never sacrifice product clarity for smaller file sizes. Your customers need accurate images to make informed decisions.
Want to prepare your product images for your online store?
Explore the available tools at Digitoly Image Converter. Convert, resize, and compress images using the options available on the platform.